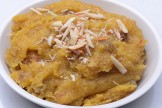
This simple to make vada with the natural sweetness of apple can be served even as Prasha...
Shahi tukda with condensed milk is a royal treat to taste buds at anytime. The simple and...
This is a delicious, quick, special dessert recipe prepared with apple and sooji. The nat...
Adhirasam is a traditional South Indian sweet which is usually made in Diwali times. It's...

Channa Dal Sooji Halwa is a most seen delicacy on religious occasions in India....

Carrot Halwa is a popular worldwide dessert with many variations, Carrot halwa or Gajar k...
|
About Recipe
|
|||||||||||||||||||||||||
|
|||||||||||||||||||||||||
 Easy recipes
 Healthy Recipes
 Dessert Recipes
 Mutton and Lamb
  Indian Bread Recipes
 Dal Recipes
 Chutney and Pickles
  Indo-Chinese Recipes
 Snacks and Appetizers
 Low Fat Recipes
 Chaat Recipes
 Biryani and Rice
  Curry Recipes
 Indian Sweet Recipes
 Egg Recipes
 Paneer Recipes
 Chicken Recipes
 Indian tiffins
 Egg less Recipes
 Soups and Salads
 Indian Sea Food
 Manchurian Recipes
 Indian Drinks Recipes
 Dinner Recipes